
In this module, I will show you how to install and configure Yoast for WordPress.
Install The Yoast SEO Plugin
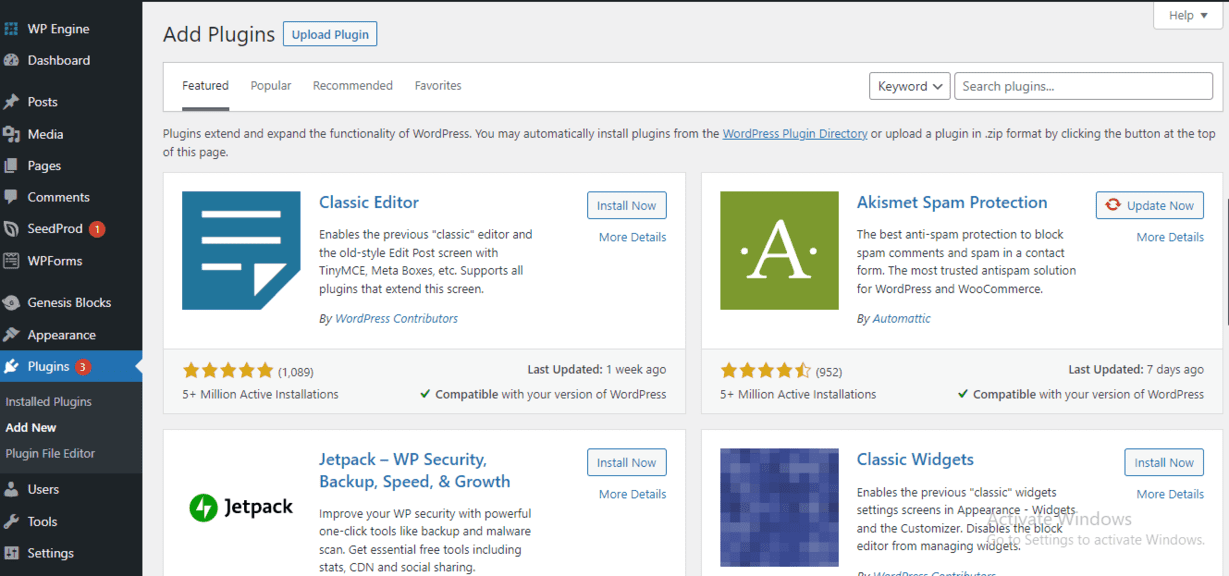
Login to your WordPress dashboard and on the left sidebar, go to Plugins > Add New.
You can skip this step and move to step 2 if you already have the Yoast SEO plugin installed on your website.
On the plugin directory page, type Yoast SEO into the search bar.
Move your cursor to the Yoast SEO widget and click Install Now.
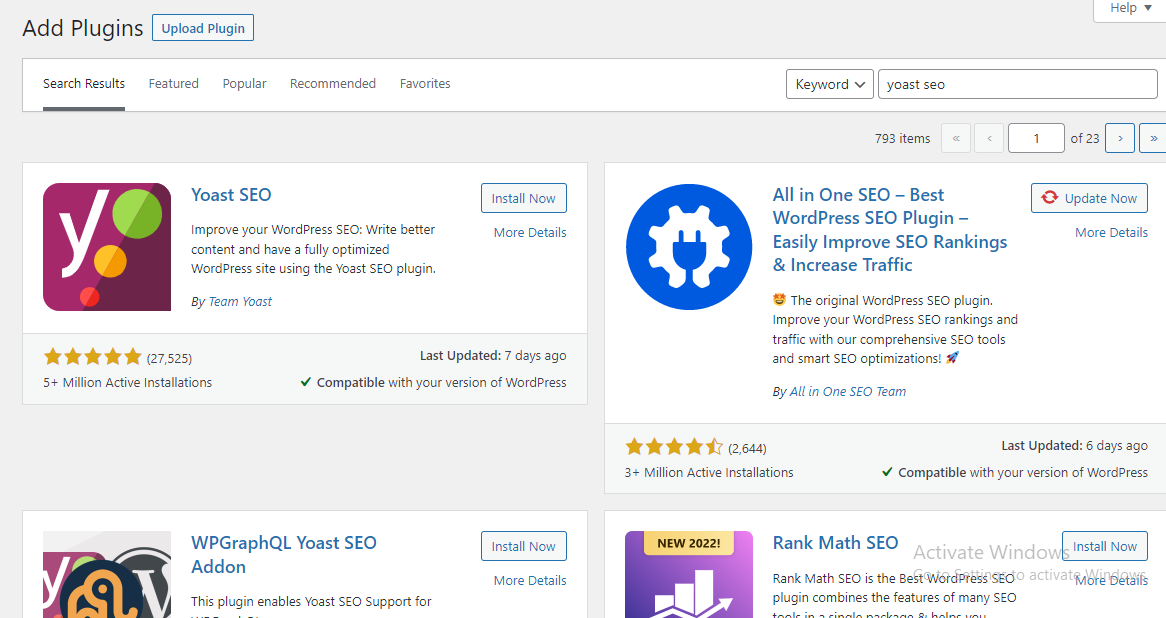
Then, click Activate.
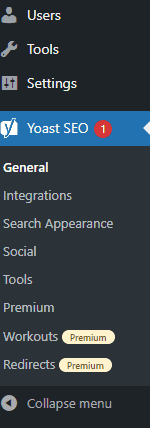
This will add the plugin to your website and you should now be able to see the Yoast SEO section added to the left sidebar on your dashboard.
Step 2: Run The First-Time Configuration Wizard
Getting the basic settings right is essential to maximizing the potential of the plugin.
The Yoast SEO configuration wizard will guide you through this process.
To run the configuration wizard, click Yoast SEO > General on your left sidebar.
This will take you to the General — Yoast SEO page.
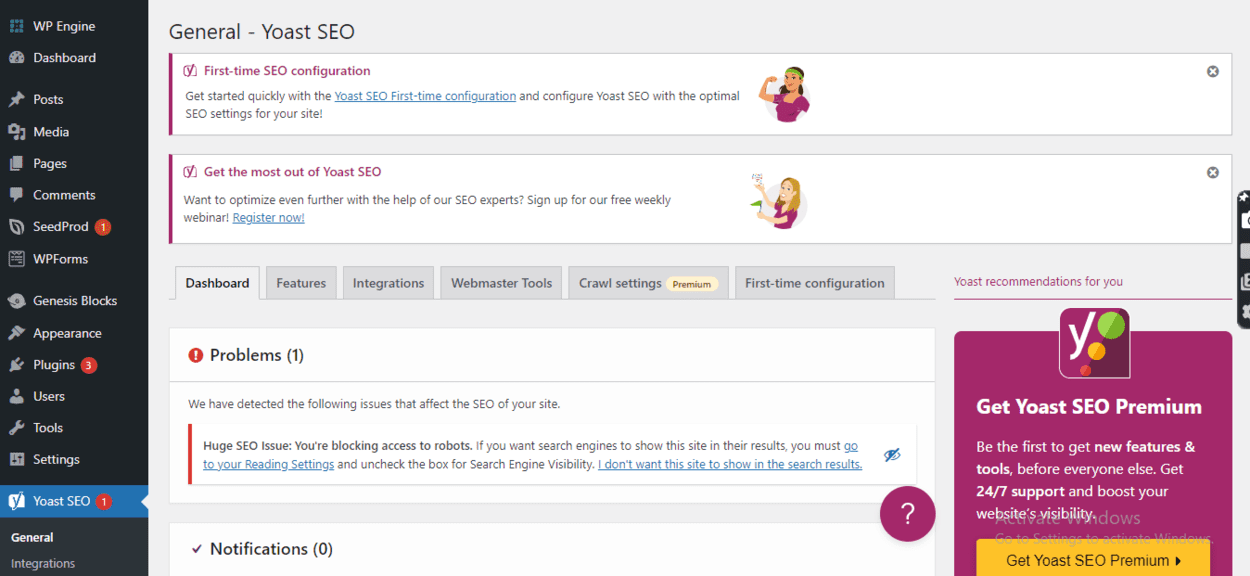
Here you will find the blue configuration wizard link under the Dashboard tab.
Click the link to access the configuration wizard sections.
Below, I will guide you through each of the essential sections:
- Environment: choose Option A to let search engines discover and index your new website.
- Site Type: toggle the classification that best describes the type of website you are operating. For example, “A Blog” will be the best description for my bloggingtips.com website.
- Organization or Person: provide the required details about yourself or your brand. This information is used by Google’s Knowledge Graph to provide accurate information about your brand at the top (Mobile) or right-hand side (desktop) of search results.
- Search Engine Visibility: leave the default settings in place, unless you have a good reason to change anything.
- Multiple Authors: toggle No if you are the only one publishing on your website. This deactivates the author archives to help prevent duplicate content.
- Google Search Console: provided you already registered your domain on the Google search console, once your click the Get Google Authorisation Code button, the plugin will import your code. Remember to click Authenticate to complete the process.
- Title Settings: choose the title separator symbol that best fits how you want to display your post titles in search results.
Step 3: Generate A WordPress XML Sitemap
An XML Sitemap helps search engines to better understand how you organized your website’s content and determine your most important pages.
To generate your sitemap, go to Yoast SEO > General on your left sidebar.
Click on the Features tab and scroll down to the XML sitemaps section.

Toggle the switch to On to generate your sitemap.
Click on the question mark icon to access your sitemap URL.

Your sitemap URL will be the See the XML sitemap link.
The next step is to enter your URL into the Google Search Console.
Move on to your Google Search Console dashboard and select your website from the sidebar.
Then scroll down the sidebar to the Index section and click Sitemaps.
On the next screen, enter your sitemap URL into the Add a new sitemap form field and click Submit.
Step 5: Customize Search Appearance Settings
Here you can customize how your website will appear in search engine results and other parts of the web.
You can access the page by clicking Yoast SEO > Search Appearance from your sidebar.
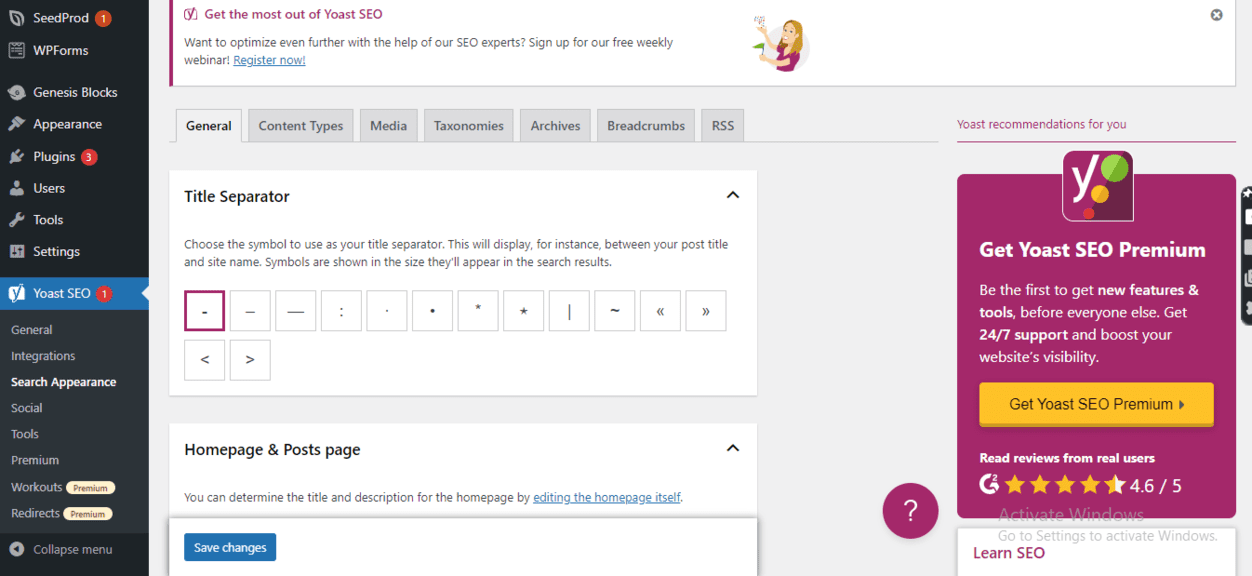
Below, I will walk you through the seven tabs available on the Search Appearance page:
- General: here you can customize the page title tag that will be displayed when people search for your brand name (homepage) on Google. This is also where you make changes to the brand information you provided to the configuration wizard.
- Content Types: this is where you specify the content types and templates you want to display in search results. I recommend sticking to the default webpage schema (pages) and article schema (posts).
- Media: I recommend sticking to the default settings in this section.
- WordPress Taxonomies: here you can configure your website’s permalink settings. I recommend going to the WordPress > Permalinks page to make any changes to your permalinks structure.
- Archives: toggle author archives Off if you are the sole author on your website.
- Breadcrumbs: they make it easier for users and search engine crawlers to navigate your website. Toggle Enabled to activate breadcrumbs.
- RSS: here you can add text and variables to be displayed before and after your post content on RSS feeds. This ensures you will always get credit as the original source and backlinks when content scrappers use your posts.
Step 5: Configure Social Options
Yoast SEO can help you customize your content to look appealing on your social profiles.
Click Yoast SEO > Social from your left sidebar to access the page.
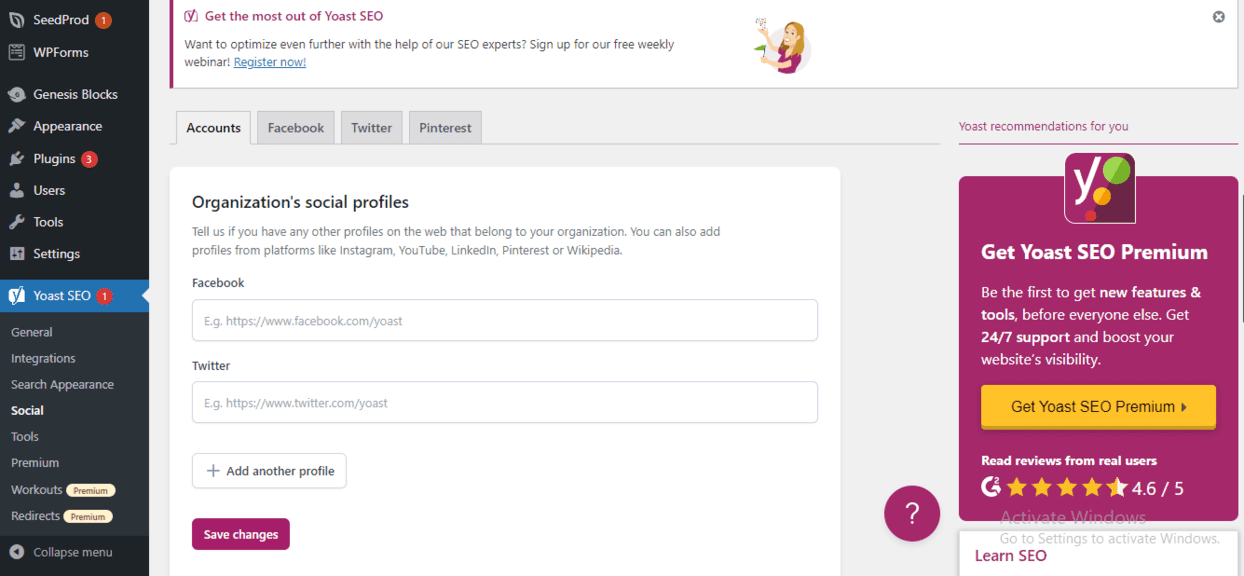
Below, I guide you through what you need to do in each of the four tabs available in the social area.
- Accounts: here you can add the URLs of your social profiles and your Twitter username.
- Facebook: toggle Add Open Graph metadata to Enabled. Then, add a title, image, and description for your Facebook homepage. In the Default Settings section, you can also add a default thumbnail image that will be used for posts that lack images.
- Twitter: toggle Add Twitter Card metadata to Enabled, and I also recommend sticking to the default card type.
- Pinterest: verify your website with Pinterest and type in the confirmation meta tag. Then, click Save Changes. I recommend sticking to the default settings in this section.
Responses